Sunday, November 18, 2012

DIY Collars


Recently I've noticed that embellished collars are really in right now. Collars in general have been in for a while, but now to spice them up, stores have been coming out with embellished collars AND embellished collared necklaces! I think the embellished collared necklaces are great because you can wear them with almost anything, collared shirts and non-collared shirts! They are also a great statement piece that can easily take your outfit from casual to fancy shmancy! After seeing some great collared necklaces in a store near my work, I decided instead of buying it, I'll take a crack at it and  make my own! 

First, you need to get some supplies!

What You'll Need: 
1. 1 piece of tan felt
2. Buttons and pearls- and other accessories to decorate your necklace
3. A jewelry chain
4. jewelry closures- I just used the extras I had from my other projects below
5. Paper stencil
6. Hot glue gun and glue sticks


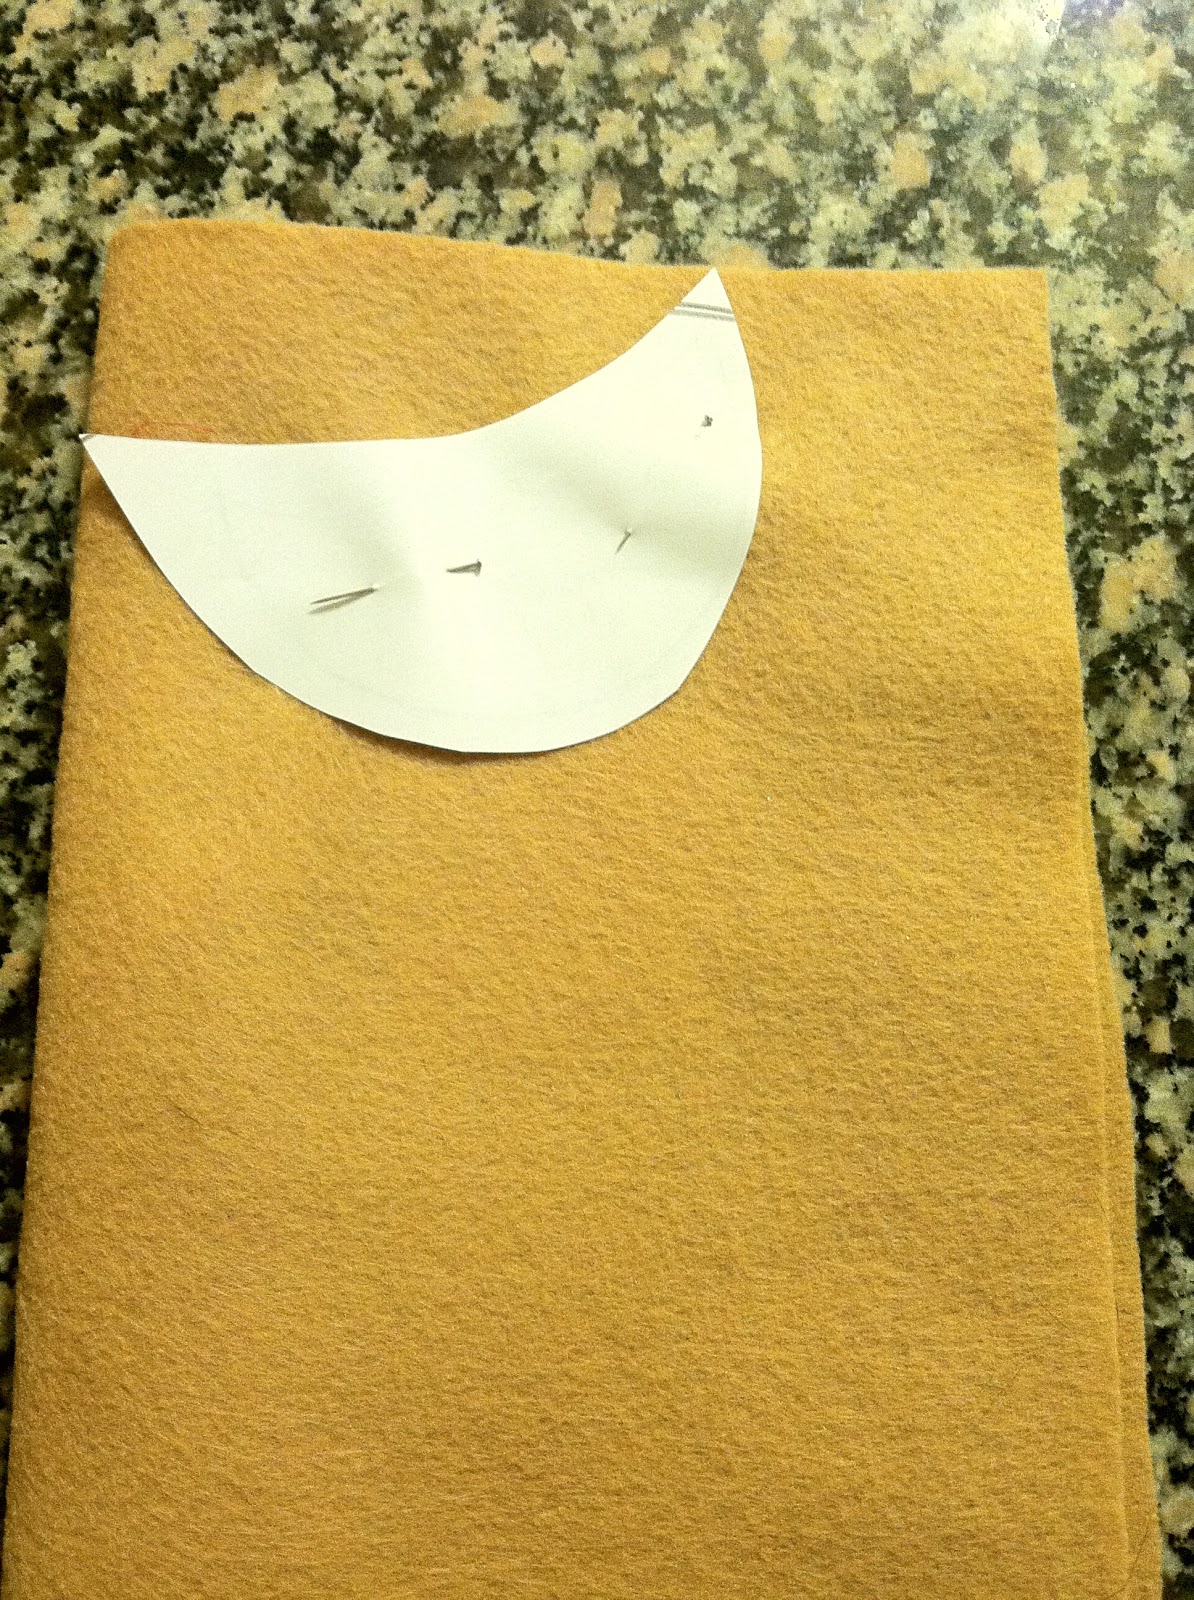
First you want to take your stencil, pin it to your piece of felt and then trace it. The trick to this is to fold your felt in half so that when you cut it out you will get two collar shapes that are connected! Make sure to trace it twice because you will need to pairs of collars. 


Now that you have traced it, cut it out!


Next you want to glue the chain onto one of the pieces of the felts. After, glue your extra felt collar on top of the other, to cover the chain. 


After you glue the other felt on top of the felt with the chain, start glueing down your buttons! I bought a string of pearls to line my collar. As for buttons, you can easily buy some, fortunately I have a huge jar of vintage buttons that my grandmother gave me! Yay for vintage buttons. 


Now that you are completed with your collar, ad the closures and time to wear your new embellished collared necklace! 


I already love my collared necklace!! It ads some spice to every outfit you pair it with! Now its your turn! Its time for you to DIY in style!

Monday, November 5, 2012

DIY Distressed Denim

If you are into fashion at all, you'll know that one huge trend this year was distressed denim shorts! They have been big this past summer and since we still haven't been able to beat the heat, distressed denim shorts are here to stay. Thankfully for you, you don't have to go to the store and spend $40 to get a pair. They are super easy to make and cost no more than about $5. Lets get started!! 

First, you'll need to look in your kitchen and visit your nearest thrift store for some tools. 

What You'll Need:
1. Denim shorts- I bought mine at Goodwill for $5! Its best to buy Levis, but any denim shorts are fine. 
2. Scissors 
3. A knife
4. A cutting board 
5. A washing machine 


First, you want to figure out where exactly you want to cut your shorts. Put them on in front of a mirror and use your sharpie to draw a line to mark where you should cut. 


Now its time to grab your scissors and start cutting. Make sure when you cut your shorts to cut the back and front separately because the front should be shorter than the back. Make sure to leave more material in the back; you do not want your rear hanging out! 


Next you want to place your shorts onto your cutting board and grab your knife. You are then going to make slits in your shorts. Cut them about an inch apart. 


Lastly, wash your shorts. This will help distress your shorts, allowing the white seams to show. 


After you dry your shorts you are ready to wear them! Mine came out great and they look exactly like a pair I just saw at Urban Outfitters! 


Now its time for you to DIY in Style and make your own!! 


Wednesday, October 31, 2012

DIY Polka Dots


Prints are a big trend this fall, especially printed bottoms! One of my favorite prints is polka dots! Polka dots are one of those classic prints that never get old and somehow always come back into style looking fresh and revamped. I work in a retail store and we recently received polka dot tights that I thought were perfect for fall AND my next DIY project! This project is super easy and the outcome is polka-perfect! 

What you'll need:
1. Tights- I bought mine at Target for $5
2. Matte Fabric Paint
3. A Paint Brush- I used the paint brush once to spread the paint but it isn't used a lot and not completely necessary
4. A Blow Dryer

Everything together cost around $10!


To start your project, you're going to start by putting your tights on. You are then going to take your fabric paint and begin painting polka dots! Terribly hard and complicated right?...No!! 

Unfortunately the paint does sink through onto your leg, but it can be easily washed off in the shower! It is important to paint the tights while they are stretched out onto your leg. If not, the polka dots won't come out good. 


After you're done painting, you can get a blow dryer and dry them. If you have time, you can also let them air dry while you're wearing them. Just make sure not to rub against anything! 

And there you have it, polka dot tights perfect for the fall! Try wearing them with a skirt or you can mix prints and wear them with a striped tunic like I did!  


Now its your turn to polka-dot-it-up and DIY in style! 


Tuesday, October 23, 2012

DIY Tribal

Bright, chunky and big are a few words to describe the Tribal jewelry trend that is very in this year. When you own a piece of Tribal inspired jewelry, you know it is a statement piece and will give any outfit you put on a little extra edge. I am a big fan of this trend so I decided to put together a little DIY project so I can have my own Tribal statement piece! I decided to make a Tribal inspired bracelet to add some spice to my arm party! 


To get started with my DIY Tribal bracelet I visited Michael's and a local hardware store to get some tools! I ended up spending around $12 dollars. 

Here's what you'll need
1. Parachute rope
2. Thick thread- make sure its thicker than regular thread so it shows more
3. Circular jewelry connectors 
4. A jewelry clasp 
5. A few bolts- this is the most expensive item, I purchased 5 of them for $5 dollars, but if you can find something cheaper go for it! 
6. A lighter


First what you'll need to do is cut the parachute rope. I cut mine in half because it was pretty long. You are then going to measure your wrist and then start layering the rope on top of each other until its layered into 5 rows.  


After, use your lighter to carefully melt the two ends of the rope together. Emphasis on the word "carefully," we don't want a wild fire to start!! Then you want to slip your bolts onto your bracelet. 


Now is the fun part! Add some color to your bracelet by wrapping small sections with your colorful thread! You can leave white space if you'd like, but I decided to wrap the whole thing in thread to make it as colorful as possible!! 


Lastly, add a circular connector to each end of the bracelet. Make sure you add the jewelry clasp to one end so you can close your bracelet. 


AND taaddaaaa! Your Tribal inspired bracelet is finished and ready to be worn! Pretty fast and very simple right? I thought so! 


Now its time for you to make your own Tribal inspired bracelet! Hop to it and DIY in style. 

Monday, October 22, 2012

DIY Cut Outs and Lace

Cut outs, cut outs, cut outs...everywhere I look I see cut out clothing, whether it be on a sweater or a top. Tts a big trend and a fun one at that! If you're a fan of fashion, you'll know that cut outs were big on the runway at the recent fashion week. Being a fashion contour, I decided to try to make my own cut out sweater top and added some lace as a fun detail. To my surprise it was very easy and took no time at all! To make things even better, the outcome was fashionably perfect and now I have cut out sweater requests from my roommates! 

To get started you'll need to pick up a few supplies:
1. A sweater- I just went to a nearby Goodwill and bought a sweater for $5! 
2. A piece of lace- I didn't have time to run to a fabric store to get this so I bought a lace shirt at Goodwill for $3 and cut out a piece of the lace from the top
3. Iron on adhesive tape- you can use a needle and thread or sewing machine as well but who has the time or casually owns a sewing machine? Iron on adhesive tape is an easy substitute and I may have become addicted to using it!
5. A sharpie
6. Scissors
7. A flat surface

Thankfully, I already owned scissors and a sharpie, along with a flat surface (who doesn't?). Oddly enough, I did NOT own an iron but my boyfriend did. Weird. Anyways, all together my purchases came out to a little over 10 dollars!! 


To begin your project, you want to lay your sweater face down on a flat surface so the back of it is facing you. You then want to take your sharpie and draw a heart of the back. It is up to you how large you make your heart, I made mine pretty big so it creates more of a statement! 


You then want to take your scissors and carefully cut out your heart. the easiest way to do this is to cut down the center of your heart first. You can then cut out each side. Make sure to cut along the line so your black mark gets chopped off! 


Now that your heart is cut out, you want to plug in your iron to let it heat up! While its doing that turn your sweater inside out. You are then going to take your iron on adhesive tape and start cutting pieces off. You then lay the pieces on the sweater tracing/outlining the heart. After you want to carefully lay your piece of lace on top of the heart. Make sure none of the pieces of adhesive tape move. Once you do that you are ready to iron! 


The easiest way to iron on the tape is to just place the iron on top of each piece of tape. Let it sit there for a few seconds so it can melt the tape. Once you are done ironing the whole heart, let it sit for a few seconds to cool off. The final step: Turn your sweater inside out and look at your final product!


And waahhhlaaaa! You are all done and ready to sport your new sweater! Get ready for a whole lot of compliments and a lot of "where'd you get that?" 


Now its time for you to try it and DIY in style!!


Monday, October 15, 2012

DIY Geometric

Geometric jewelry is a big trend right now. Every store I've been in recently has some sort of triangle-shaped necklaces for sale that are brightly colored and immediately catch your eye. So instead of splurging and buying one for $30-$40 dollars, I decided to try making one myself! I admit, I was worried at first, I do not consider myself a very artsy person...but my final product turned out pretty well and was easier than I thought. So, if I can do it, so can you...try it out! 

First, you'll need to make a little visit to an art store to get some supplies. I went to Michaels Arts and Crafts to get mine. 


While you're there you'll need to get:
1. Clay (oven bake) 
2. A pan
3. Paint- I bought the brand Americana because it has bright colors and is good for painting clay
4. Paint brush
5. Knife (I just grabbed one from my kitchen!) 
6. A chain
7. Circular connectors
8. Nail polish- clear top coat if you want to give your necklace some shine
9. A safety pin

After purchasing the items, I spent a little less than $20 dollars! 


First, you want to get your clay and press it down to flatten it. I used a pen to roll it flat! After you want to get your knife and cut out triangles. I cut out 9 for mine. 


After cutting out your triangles, you want to poke holes into the corners of each triangle. This will allow you to connect them at the end. 


Next, you want to lay your clay triangles onto a pan to bake. Make sure to read your clay package to determine how long and at what temperature to cook at. I cooked my clay at 275 for 30 minutes. 


After you bake your clay, let it cool off for a little. Once its cooled off you're ready for the fun part, PAINTING!! I did about two coats on mine. Once they were completely dry, I slapped on a top coat of clear nail polish to give the triangles a shiny look. 


Next, you want to get the circular connectors and start connecting the triangles into 3 rows. After your rows are complete, connect the top row to your chain and you are good to go! 


I recently wore mine to work and I got so many compliments! People were shocked when I told them I made it myself! 

So now its your turn to DIY in style.